Stream data from Wearable Sensing’s DSI-24
This tutorial will demonstrate how to connect the DSI-24 to your computer and PhysioLabXR. The DSI-24 is Wearable Sensing’s dry electrode EEG system. This tutorial will be primarily focused on the Windows platform
Turn on the DSI-24.
Go to Device Manager.
Expand the Bluetooth section.
Disable Intel(R) Wireless Bluetooth(R) or whatever is your default Bluetooth driver.
Plug in the Bluetooth adapter provided by Wearable Sensing’s.
Go to Bluetooth settings.
Scroll down to device settings.
Turn the Bluetooth devices discovery setting from Default to Advanced. (If you are on Windows 10, this step can be ignored).
Plug in the Bluetooth adapter provided by Wearable Sensing
Go to Bluetooth settings
Scroll down to device settings
Turn the Bluetooth devices discovery setting from Default to Advanced. (If you are on Windows 10, this step can be ignored)
Connect the DSI-24 to your device as if you would connect a mouse or headphones. (Should be named DSI24-{serial number}).
Go back to Bluetooth Settings.
Scroll down to more Related Settings.
Click on more Bluetooth Settings.
Click on COM Ports and make note of the COM port number that has the name: DSI24-{serial number} “Bluetooth Serial Port”.
Connect the DSI-24 to your device as if you would connect a mouse or headphones. (Should be named DSI24-{serial number})
Go back to Bluetooth Settings
Scroll down to more Related Settings
Click on more Bluetooth Settings
Click on COM Ports and make note of the COM port number that has the name: DSI24-{serial number} “Bluetooth Serial Port”

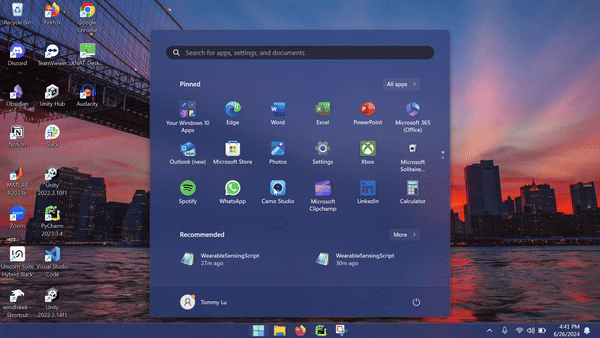
Open PhysioLabXR.
Go to Script Tab.
Click Locate and find the WearableSensingScript.py.
The script can be downloaded from WearableSensingScript.py.
from pylsl import local_clock
from physiolabxr.scripting.RenaScript import RenaScript
from physiolabxr.thirdparty.WearableSensing.DSI_py3 import *
import numpy as np
import sys
from physiolabxr.utils.buffers import DataBuffer

#Creating a data buffer with the DataBuffer class
data_buffer = DataBuffer()

is_first_time = True
time_offset = 0  # time offset for the first packet to the local_clock()
@SampleCallback
def ExampleSampleCallback_Signals(headsetPtr, packetTime, userData):
    #This is the function that will be called every time a new packet is received
    global data_buffer
    global is_first_time
    global time_offset

    #Grab the headset by using a pointer
    h = Headset(headsetPtr)
    #Get the signal from each channel and format it so that it can be created into an array
    new_data = np.array(['%+08.2f' % (ch.GetSignal()) for ch in h.Channels()])
    #Reshapes the array into a 24x1 array so that it can be inputted into the data_buffer
    new_data = new_data.reshape(24,1)
    #Rearrange new_data to fit with desired output format
    new_data = new_data[[9, 10, 3, 2, 4, 17, 18, 7, 1, 5, 11, 22, 12, 21, 8, 0, 6, 13, 14, 20, 23, 19, 15, 16], :]
    #Get the time of the packet as a temporary solution to timestamps
    if is_first_time:
        time_offset = local_clock() - float(packetTime)
        is_first_time = False

    t = [float(packetTime) + time_offset]
    if new_data.shape[1] != len(t):
        print('Data and timestamp mismatch')
        print(new_data.shape)
        print(len(t))

    #Create a dictionary with the stream name, data, and timestamps
    new_data_dict = {
        'stream_name': 'DSI-24',
        'frames': new_data,
        'timestamps': t
    }
    #Update the data buffer with the new data
    data_buffer.update_buffer(new_data_dict)
class DSI24(RenaScript):
    def __init__(self, *args, **kwargs):
        """
        Please do not edit this function
        """
        super().__init__(*args, **kwargs)

    def init(self, arg = ''):
        #Create a headset object
        self.headset = Headset()
        #Set the message callback to ExampleMessageCallback
        self.headset.SetMessageCallback(ExampleMessageCallback)
        #Retrieves the command line arguments
        args = getattr(sys, 'argv', [''])
        #Set the default port to the first command line argument based on the parameter provided by user
        default_port = self.params['COM Port']
        #Connect the headset
        self.headset.Connect(default_port)
        #Start the data acquisition based on the parameter provided by user
        if arg.lower().startswith('imp'):
            #Currently not used
            self.headset.SetSampleCallback(ExampleSampleCallback_Impedances, 0)
            self.headset.StartImpedanceDriver()
        else:
            #Set the sample callback to ExampleSampleCallback_Signals
            self.headset.SetSampleCallback(ExampleSampleCallback_Signals, 0)
            if len(arg.strip()): self.headset.SetDefaultReference(arg, True)
        #Start the data acquisition
        self.headset.StartBackgroundAcquisition()


    def loop(self):
        #Called every loop based on the user's chosen frequency
        global data_buffer
        #If the data buffer has data, then set the output to the data buffer
        if len(data_buffer.keys()) > 0:
            self.set_output(stream_name = 'DSI-24', data = data_buffer.get_data('DSI-24'), timestamp = data_buffer.get_timestamps('DSI-24'))
            #Clear the data buffer
            data_buffer.clear_stream_buffer_data('DSI-24')

    def cleanup(self):
        #Called when the script is stopped
        global data_buffer
        global is_first_time
        global time_offset
        #Stop the data acquisition
        self.headset.StopBackgroundAcquisition()
        #Disconnect the headset
        time_offset = 0
        is_first_time = True
        self.headset.Disconnect()
        data_buffer.clear_buffer()
Add an output and name it “DSI-24”.
Change the number of channels to 24.
Add a Parameter Widget to the script by clicking on the + sign.
Change the name of the parameter to COM Port and switch the type of input to “str” so that we can input the COM port.
Input the name of the COM port that you noted earlier. This will allow for PhysioLabXR to connect to the DSI-24.
Press Run.

Now the data stream is available as an LSL stream named DSI-24.
To view the data stream, go to the Stream Tab.
Input DSI-24 in the Add Stream box and press the Add Widget button.
Click the Start Button to start data stream.
It is recommended that you change some of the settings for your stream. You can follow the steps here to change the settings. For this tutorial, we added a Butterworth High Pass Filter with a cutoff frequency of 0.01 Hz, Nominal Sampling Rate of 250 and Group Channels Constant Offset to 50 by first pressing on the Gear icon and then on the top Default Group name.

To see the FFT of the signals from the DSI-24 right-click on the stream and select FFT.

Now that you have the data streaming: check out these docs: