Build PhysioLabXR Executable
This guide is about how to create executable files from PhysioLabXR from the source code. You can build PhysioLabXR executable for Windows, MacOS, and Linux.
PhysioLabXR uses two packages to build the executable: pyinstaller and
auto-py-to-exe, where
the later is a GUI for pyinstaller that make editing the build configuration easier. In either case, complete
build configuration is included in this guide and you can use it to build the executable directly without modifying them.
Should you encounter any issues during the build process. Please visit the Troubleshooting page for help.
General Step
First you need to have a local copy of PhysioLabXR source code, and make sure you can run the App from source code. Follow the run from source guide for a step-by-step instruction on how to do it.
Then, follow the platform specific guide to build the executable.
Windows and Ubuntu
We will use auto-py-to-exe to build the executable. Install it with the command
pip install auto-py-to-exe.Open auto-py-to-exe by typing
auto-py-to-exein the terminal. You will see the following window.
Enter your PhysioLabXR source code’s path below (e.g.,C:\PythonProjects\PhysioLabXR) and click the download button to download the build configuration file.
After you got the build configuration file, click Import Config From JSON File and select the configuration file you just got.

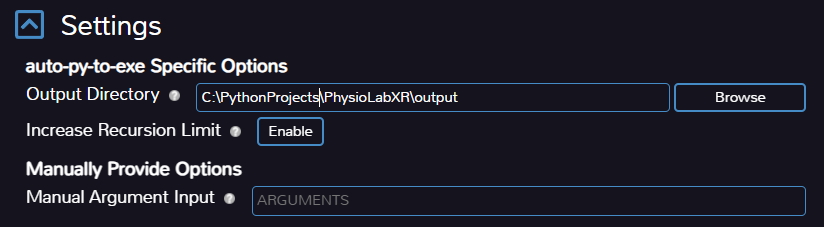
- You may change where the final executable is saved under Settings-> Output Directory. The default output directory
is a folder named “output” under source code directory.
To start the build process, click on the “CONVERT .PY to EXE” button at the bottom of the window.
Once the build completes, you can find the executable in the output directory you specified in step 3.
MacOS
We will not use auto-py-to-exe to build the executable on MacOS. Instead, we will use pyinstaller directly, the
following step explains why.
Use pyinstaller library to build the executable
There is a known issue with pyinstaller on MacOS working with
PyQt >= 6.5. See details about this issue here. To build the app on MacOS, you will need to install pyinstaller from a develop version of pyinstaller. To do so, run the following command in your terminal.
PYINSTALLER_COMPILE_BOOTLOADER=1 pip install git+https://github.com/pyinstaller/pyinstaller.git@develop
2. Complete the following command by typing in the input box with . Then run this command in terminal at the root directory of your project.
pyinstaller --noconfirm --onedir --console --add-data "ROOT_PATH/physiolabxr/scripting:physiolabxr/scripting/" --add-data "ROOT_PATH/physiolabxr/_media:physiolabxr/_media/" --add-data "ROOT_PATH/physiolabxr/_presets:physiolabxr/_presets/" --paths "ROOT_PATH/physiolabxr/arduino" --paths "ROOT_PATH/physiolabxr/deprecated" --paths "ROOT_PATH/physiolabxr/examples" --paths "ROOT_PATH/physiolabxr/interfaces" --paths "ROOT_PATH/physiolabxr/scripting" --paths "ROOT_PATH/physiolabxr/sub_process" --paths "ROOT_PATH/physiolabxr/threadings" --paths "ROOT_PATH/physiolabxr/_ui" --paths "ROOT_PATH/physiolabxr/utils" --paths "ROOT_PATH/physiolabxr" --add-data "ROOT_PATH/physiolabxr/_ui:physiolabxr/_ui/" "ROOT_PATH/physiolabxr/PhysioLabXR.py"
Two folders, “build” and “dist” will be created in the source code directory when the build runs.
Once the build finishes, the Mac executable is in the dist/PhysioLabXR folder.
How to run the executable
Your root directory structure will look like this after a successful build.

Go into the target build directory. Click on the circled icon in the following image to run the executable.
The executable is named “main” in this example, but it will have different names if you chose different name options as you were building the executable.
